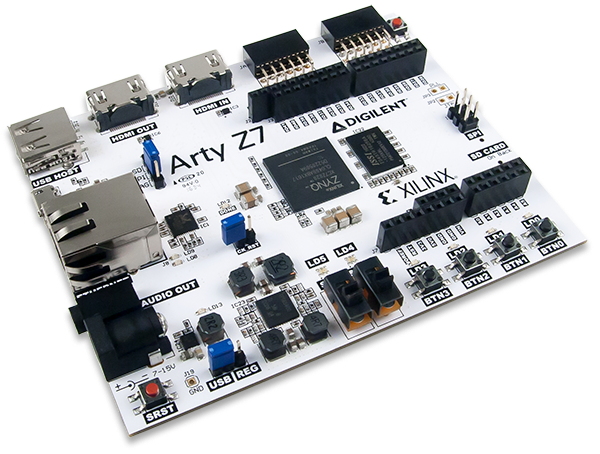
Running the example on the Arty Z7-20 board

Fig. 1 - Arty Z7-20
Setting up the board
The demo, in addition to the miscellaneous listed in the How to run the demo page, is composed by:
- Zynq7000 board (Arty Z7-20 Board, using the Zynq7020);
- Linux Workstation;
- MakarenaLabs evaluation image file for Arty (please write to [email protected] to get the access);
- A MicroSD card greater than or equal to 16GB;
Image File Installation
- Download the MakarenaLabs image and, if it is necessary, merge the downloaded image files into a single image file using 7Zip.
-
Verify the SHA-256 hash of the image file. This will ensure that no errors occurred in the transmission and merge of the files. If your system is Windows 11:
- Click Search and run
powershell. (Note:cmdwill not work). - Navigate to the directory containing the image file.
- Enter
Get-FileHash <filename>. - Wait 15 to 30 seconds.
- The hash value will appear.
- Click Search and run
-
Flash the MakarenaLabs image file to the microSD card with Balena Etcher (or another similar one). Please note that the image must be written to the microSD card as a boot.image.
Next, connect the Arty to your router with an Ethernet cable. The board is configured to boot with DHCP, thus it should be dynamically assigned an IP by your router. Determine the IP addresses of your Arty board and also your workstation, using your router's management software. Some routers make the software available by typing 192.168.1.1 in your web browser. If you the router's management software is not accessible or available, it has also a static IP address (192.168.2.99) you can use to connect to. In this case, you have to be in the same subnetwork of the Arty Z7, so set your network adapter properly. The addresess are needed to run the demo. To power the Arty simply connect a micro-USB cable from the board to your PC or to a USB power adapter.
Populate Faces Database
-
Connect the 2D USB webcam to the Arty z7, and the 3D camera to a USB 3.0 port of your PC.
-
The first step to run the demo (optional, but strongly suggested for testing) is to add your face to the database.
-
Check the Arty z7 IP address, then open your browser and tap
[ip address of board]:9090(i.e.192.168.2.99:9090). This will open a Jupyter Notebooks environment. -
Navigate to the folder
smart-lock/driver. Here you will find a notebook calledtakeAPic, open it. -
Place in front of the USB camera of the setup, and then tap three times
Shift+Enterto executes the three cells of the notebook. -
Stay in front of the camera for 10-20s, as the startup of the Notebook requires some time.
-
After taking the pic the Notebook will ask for the filename to save in the database, then press enter to save it.
-
Write the name but do not insert any extension in the name (i.e. guglielmo and not guglielmo.jpg).
At this point check inside the folder named database to verify that the photo of your face exists with the name you assigned to it. At this point you can close the Web Tab.
Start recognition process
-
Open a terminal and connect to the board via SSH. To do so you need to tap into the terminal:
ssh xilinx@[ip address of Arty]It will ask you the password. The password is
xilinx. -
To navigate to the folder where the script is placed, execute:
cd jupyter_notebooks/smart-lock/driver -
To start the routine, you must run the next step with sudo privileges. So:
sudo /usr/local/share/pynq-venv/bin/python smart_lock_arty.py --ip [your_workstation's_IP] --camera_index -1You must set the IP address of your workstation and the camera index value, which is
-1so the OS is able to choose the camera index independently. This will start the routine of smart lock which is now waiting to have input fed from your PC. The python script is ready when the log Start Smart Lock Routine appears.
Start 3D software on your Workstation
First of all, you must configure the tool inside your workstation. Only the steps for a Linux environment are provided, because the Windows version is not currently available.
Linux Version
Go to the path where you have downloaded the libroyal SDK provided by MakarenaLabs (please contact us at [email protected] if you do not have the SDK) and go to the build folder:
cd [/path/to/your/libroyale]/samples/to_arty_7z/build
Please be sure to have these prerequisites to continue (we are currently refer to an Ubuntu distro, please check the right commands for your platform):
You can install them running:
sudo apt update
sudo apt install -y libopencv-dev libpcl-dev libzmq3-dev
If all the requirements are met, then you can proceed to configure the tool with:
cmake ..
make -j8
At this time, you are able to start the 3D software in your workstation. So, you can start the 3D software running
./smart_lock_sender 192.168.2.99
Now the routine of SmartLock should start and print out status messages to Arty console which describes what is happening and whether the Arty and Workstation are exchanging messages.
Windows Version
Currently not supported