Running the example on the Kria KV260 board

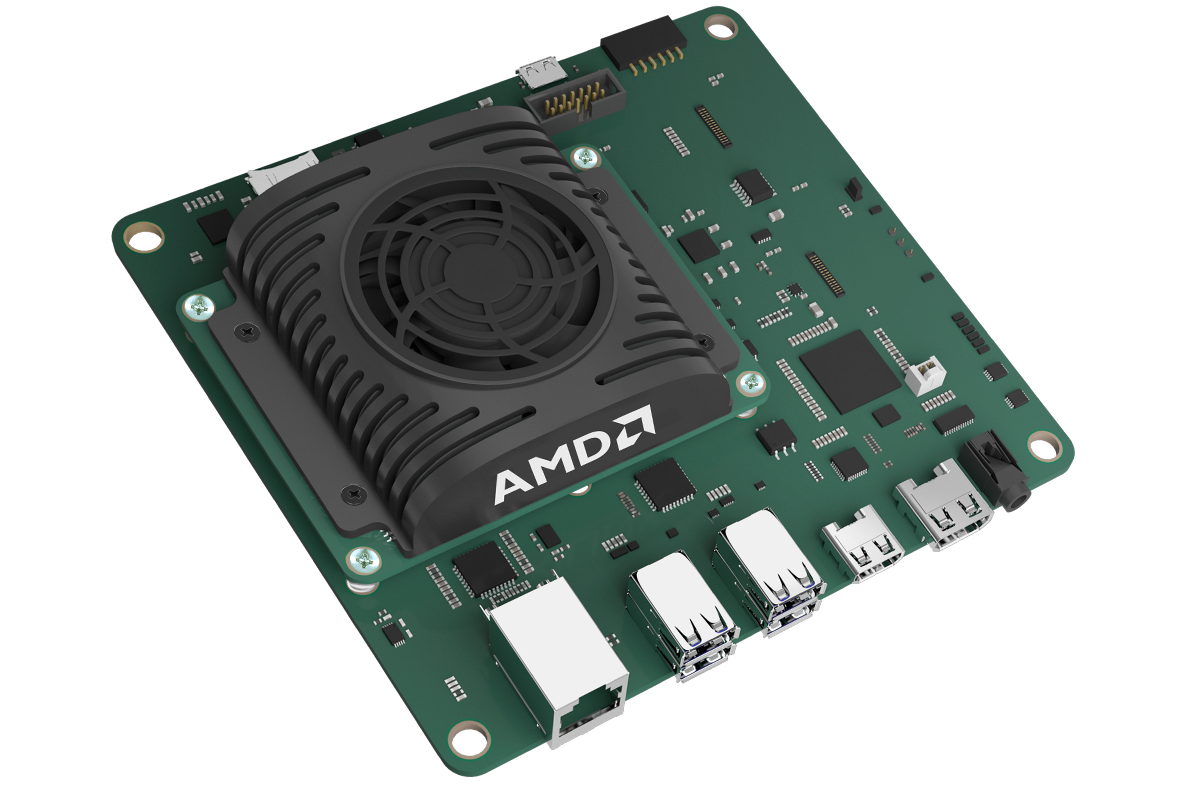
Fig. 1 - Kria KV260
Setting up the board
The demo, in addition to the miscellaneous listed in the How to run the demo page, is composed by:
- Face recognition image file, available from MakarenaLabs (please write to [email protected] to get the access);
- Kria KV260 Board;
- A MicroSD card greater than or equal to 16GB;
If you are running on a Windows environment, please check if you have all the software requirements needed and described in the Hardware & Software requirements chapter.
Board connection
For this demo there are two connection ways:
- With an ethernet cable using your workstation (all hardware requirements should be satisfied);
- Directly using an external monitor. In this case, as it is written in the hardware and software requirements chapter) you need also:
- Full-HD monitor (1920x1080);
- HDMI cable;
- Keyboard and mouse kit;
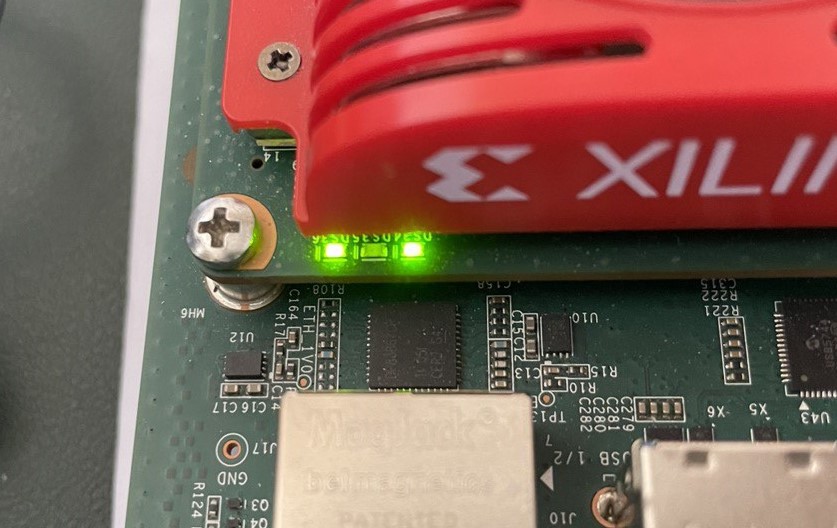
When the Kria boots, please check the three LEDs near the fan. The center light should blink and the other two lights should be solid when the board has successfully booted.

Fig. 1 - Kria KV260 booting LEDs
Ethernet connection
If you have chosen to use your local setup to connect to the board, start connecting via ethernet cable the Kria to your router. The board is set with DHCP, thus it should be dynamically assigned an IP from the router. Check the address of your board and PC on your router manager software. Those addresses are necessary to start the demo.
Open a terminal and connect to the board via SSH. To do so, you need to run into the terminal:
ssh root@[ip address of KRIA]
It will ask you the password (type root). If you entered it correctly, you are successfully connected to the board.
Standalone connection
If you have chosen to connect directly to the Kria board using an external Full-HD monitor, you must follow these steps, starting with the board off:
- Connect the Kria to the Full-HD monitor with the HDMI cable;
- Connect the keyboard and mouse kit to the Kria;
- Power on the board and wait until the home page is shown on the external monitor;
- Open the terminal clicking on the
Terminalicon in the home page;
Now the board is ready to use.
Image File Installation
- Download the MakarenaLabs image. They are 4 files to be merged together with 7Zip;
- Merge the downloaded image files into a single image file;
- Verify the SHA-256 hash of the image file. This will ensure that no errors occurred in the transmission and merge of the files. If your system is Windows 11:
- Click Search and run
powershell. (Note:cmdwill not work); - Navigate to the directory containing the image file;
- Enter
Get-FileHash <filename>; - Wait 15 to 30 seconds;
- The hash value will appear;
- Click Search and run
- Flash the MakarenaLabs image file to the microSD card with Balena Etcher. It must be flashed as a boot image;
Connect the 2D USB webcam and the 3D camera to the USB ports of the Kria and wait about 3 or 4 seconds. If you want to know the IDs of the cameras plugged in, run the following command
v4l2-ctl --list-devices
you will have an ouput similar to the following
web camera: XM Camera (usb-xhci-hcd.1.auto-1.1):
        /dev/video0
        /dev/video1
        /dev/media0

pmdmodule287xUVC (usb-xhci-hcd.1.auto-1.3):
        /dev/video2
        /dev/video3
        /dev/media1
where the ID of the camera we need is the first one. In this case, our 2D camera is the one named web camera: XM Camera with its ID = 0, while the 3D camera is called pmdmodule287xUVC with its ID = 2 (basically you have to take the number at the end of the path, so the web camera has ID 0 because it has the path /dev/video0 which ends with 0).
Start the MuseBox Server process
The first step to run the demo is to start the MuseBox Server process.
-
Go to the MuseBox's root directory with
cd /home/root/smartlock-core-kria-kv260/musebox-server -
To run the MuseBox Server, tap
./MuseBox zmq -
The server is ready when the server's port is shown on terminal, for example
MuseBox Server - v3.0.0
Checking license...
No license needed
License ok
remove from slot 0 returns: 0 (Ok)
kv260-benchmark-b4096: loaded to slot 0
FaceDetection init success.
FaceRecognition init success.
Database /home/root/smartlock-core-kria-kv260/musebox-server/database/ feature extraction success.
FaceLandmark 196 points init success.
ZeroMQ selected
****************************************************************************
*                 MuseBox server is running at port 9696!                  *
****************************************************************************
Populate Faces Database
The second step (optional, but strongly suggested for testing) is to add your face to the database. You can do that using the MakarenaLabs take-a-pic tool.
For this step, please be sure not to have the 3D camera attached to the board in order to avoid some priority problems in the automatic choosing of the camera by the OS.
Configuration
To configure take-a-pic tool, first open a new terminal and connect to the board with ssh root@[ip address of KRIA]. The password is root.
When you are connected to the board, go to the tool's root directory using:
cd smartlock-core-kria-kv260/take-a-pic
The tool has several configuration flags and parameters that we are going to explain. To run the help function of the tool, run:
venv/bin/python takeAPic.py --help
and it will show an output like this one
usage: Take a Pic [-h] [-c CAMERA_ID] [-sh SUB_HOST] [-ph PUB_HOST] [-sp SUB_PORT] [-pp PUB_PORT] [-v]

Take a Pic

optional arguments:
  -h, --help            show this help message and exit
  -c CAMERA_ID, --camera CAMERA_ID
                        Camera ID
  -sh SUB_HOST, --sub_host SUB_HOST
                        Subscriber Host
  -ph PUB_HOST, --pub_host PUB_HOST
                        Publisher Host
  -sp SUB_PORT, --sub_port SUB_PORT
                        Subscriber Port
  -pp PUB_PORT, --pub_port PUB_PORT
                        Publisher Port
  -v, --version         show program's version number and exit
where:
-c: you use this flag to set the id of 2D camera which is used to take the pic of your face. Default value is-1, so the OS can choose by itself the 2D camera;-sh: the host of the subscriber. Default value is127.0.0.1;-ph: the host of the publisher. Default value is127.0.0.1;-sp: the port of the subscriber. Default value is5556;-pp: the port of the publisher. Default value is9696;-v: it is used to show the current version of the tool;
Execution
Before starting the execution, verify that the 2D camera is attached to a USB port on the Kria board and do not forget to verify its right ID as explained at the top of this section. In our case the ID of 2D camera is 0, so:
-
Execute the script with the command
venv/bin/python takeAPic.py -c 0and place yourself in front of the cameras.
-
Follow the monitor tool instructions. You will have to press the
ckey to take a pic, or theqone to quit. -
You should now see a new line asking to insert the name of the file.
-
Please insert it without the file extension (i.e. guglielmo, not guglielmo.png).

Fig. 1 - TakeAPic with 1 person
At this step, you have to restart MuseBox Server to recognize the new face:
- Go back to the same terminal where the server was started and tap
Ctrl + C; - To restart MuseBox Server run
./MuseBox zmq;
Start demo software
Verify that the 3D camera is attached to a USB port on the Kria using a USB 3.2 data cable. Please note that a common reason for failure is the use of a USB cable rated for power but not for USB 3.2 data.
The smart_lock_bin executable accepts two necessary parameters and three optional flags as input. The first value you must send to it is the ID of the 2D camera which you have obtained in the previous steps. The second one is the 3D confidence which indicates the similarity of the face being recorded with a real face model, represented as a point cloud. Basically, the lower is the value of the 3D similarity, the more confident the system is in validating an actual human face. A real face must have a similarity less than or equal to that value to be considered so. By default this value is set to 1800. Then, the three flags are:
--show: with this flag you can enable the user interface in order to see the camera output;--debug: this flag is used to know the state of some variables within the code;--no-fullscreen: this flag avoids the fullscreen mode (not recommended using the standalone connection);
So, for example, if we run the command ./smart_lock_bin 0 1800 --show, we are setting the 2D camera with ID 0 and the 3D threshold to 1800, so our face has to be a similarity less than or equal to that value to be considered so.
Let's start with the next steps.
- On the same terminal of
take-a-picor on a new terminal, repeat the ssh connection process -
Go to the SmartLock Core build directory with:
cd /home/root/smartlock-core-kria-kv260/build -
Run the
smart_lock_binexecutable with two parameters: 2D camera index and the 3D confidence. An example might be:./smart_lock_bin 0 1800 --showwith the
--showflag the graphic interface can be activated and the images are shown in full screen (by default). When the face is recognized, the flow stucks and asks you to press therbutton on the keyboard to restart the recognition flow. -
If your
builddirectory should be empty, build the executable running the following command (from thebuilddirectory):cmake .. && make -j2
This will start the SmartLock algorithm and the results of the AI models will be displayed on this new terminal.